My Introduction

Hello! My name name is Alistair Price (candidate number 9137) and this is my A2 Media blog. As a member of group 1, I am working alongside Amber Mota (candidate number 9114) and Shayam Utting (candidate number 9164). To see my work, please use the labels on the right named "A2 Research and Planning", "A2 Construction" and "A2 Evaluation".

'Trip Switch' by Come What May

Our Album Cover

Our Album Cover
Outside Digipak Panels

Our Album Cover 2

Our Album Cover 2
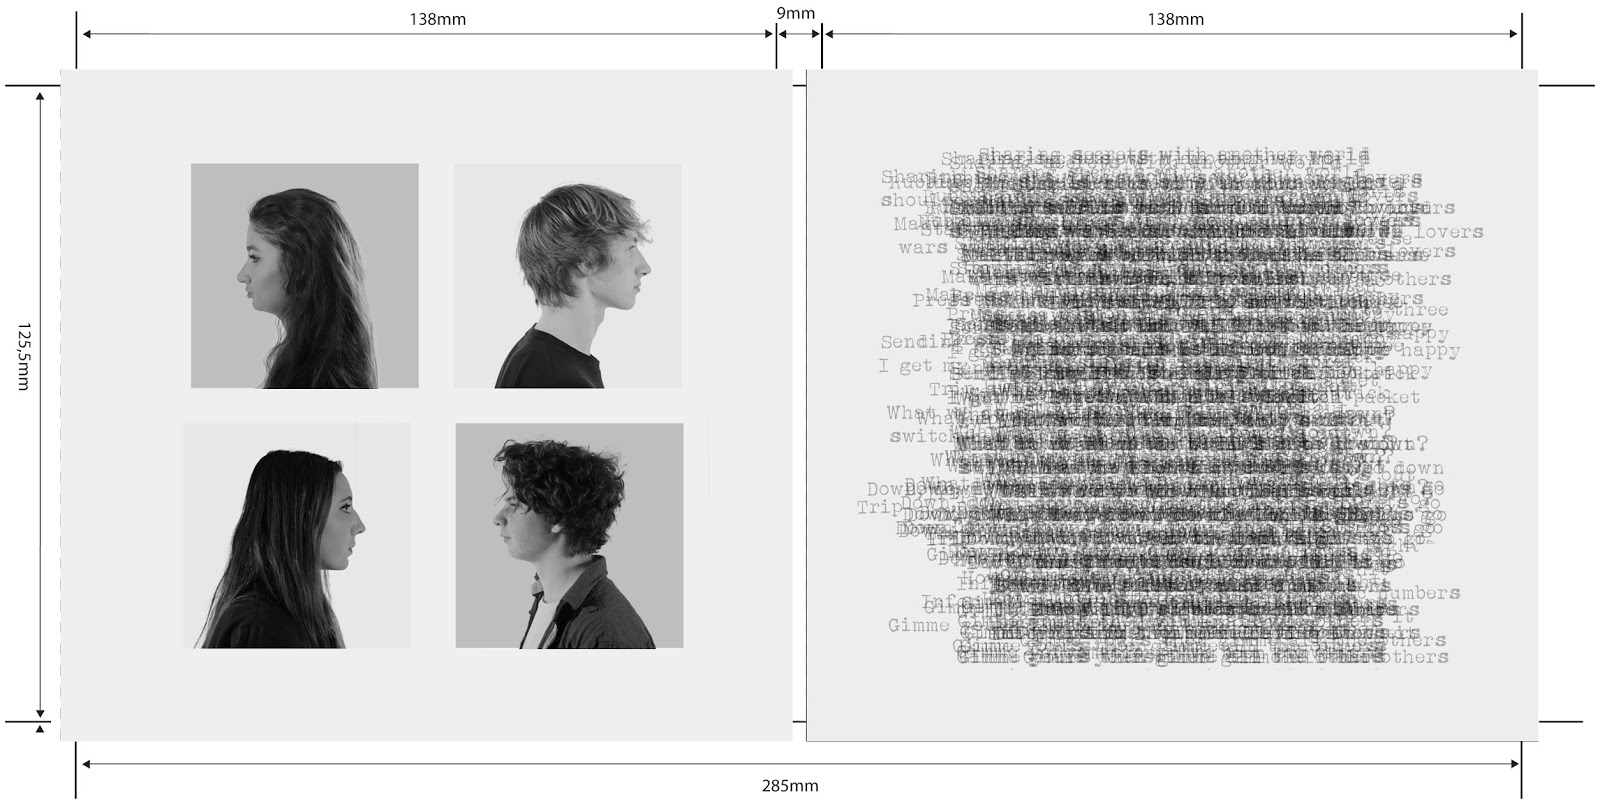
Inside Digipak Panels
Our website navigation bar: please click on it to see the website
Showing posts with label A2 Research and Planning. Show all posts

Saturday, 12 December 2015

R+P Post 33: Reflections on my Role and Contribution During Research and Planning

I believe I have played a very important role during the research and planning phase of this project and my contribution has been essential to the development of our ideas. In particular, my role in the planning phase has been especially important, as I put a lot of work into developing the idea we have for our video and making sure that our ambitions remain feasible.

Below are a couple of the ways in which I have contributed to the project during research and planning:

I contributed to our group's timeline and storyboard considerably, as I quickly realised that these documents would be essential to the development of our ideas. Alongside Shayam, I made sketches and of each of our key shots and compiled them onto the storyboard. For the timeline, I produced a document that had both a list of the important parts of the song as well as a visual timeline.

Additionally, I put the final touches on our album's flat plan. It was important that this was done sooner rather than later, as this flat plan will impact both the promo shoot during the construction phase as well as the creation of our album digipak itself.


One of my roles during the
test shoot was managing our time
In preparation for and during our test shoot, I took on the role of assistant director and camera operator. Before the shoot I focused on creating the shootboard to ensure that we would know what shots we would need to take. Whenever I wasn't using the camera, I kept an eye on our schedule to make sure we were within time, and made adjustments to this schedule when they were needed. I believe our test shoot would not have been as useful as it was without this input.


Finally, another major contribution I made was my management of the studio lighting during our test shoot. This meant that it was my job to figure out the best lighting setup for our set with the lighting desk up in the studio gallery. This proved quite challenging, as our studio set had a lot of different components which needed to be lit differently.


Friday, 11 December 2015

R+P Post 32: Test Shoot and Rough Edit

The importance of our test shoot should not be underestimated: not only will it allow us to get a clear idea of how the different elements of our project will work together, but it will also be our first time shooting on the rooftop. We have decided to make another schedule, like we did for our rehearsals, in order to clarify when we can use the studio. Again, our allocated time is in orange.
This schedule is only for our concept shoot in the studio, our rooftop shoot will be taking place on the 5th of November.

Unfortunately, our drummer, Seb, will not be able to make it to our rooftop test shoot. Therefore we will be unable to take any master shots of the whole band or any of his individual shots, though we will be able to make up for this in our rough edit with some footage we shot from our rehearsals.

Reflections on Concept Test Shoot
This shoot was reasonably successful. The setup only requires our lead singer, Luke, so it was quite easy to work through our shots quickly. As well as this, all of the footage we shot in this shoot can be used in our final edit, with the exception of the footage during our second chorus. Here are some examples of the footage we were able to shoot.

Reflections on Performance Test Shoot
Although we didn't have our drummer, we were able to test our set design map to see if it worked for our intended setup. Thankfully this was the case; some very minor adjustments gave us a good lighting setup. Below are some examples of the footage we were able to shoot.

Reflections on Rough Edit:

Our priority during the rough edit was to edit our studio footage in the way we wanted it. Specifically, we wanted some of these shots to cut in between the actions of our lead singer. Below are some examples of the editing we implemented.


Edit 2Edit 1The shots of our concept in the studio are edited inbetween some of our performance footage. This is how we intend to edit the video for our final cut.

One of the major concerns that has arisen from our rough edit so far is that our first chorus is a little bit dull. Although we have not yet implemented our idea of the paper piles shifting height, progression is something that we will have to reconsider. Similarly, the convergence of the conceptual element and the performance element is not quite clear, but this is primarily due to the lack of master shots we were able to take during our shoot on the rooftop. Before our main shoot, we intend to plan out another three-minute storyboard so that we can be certain that our progression is sufficient.

Below is our final version of the rough edit:

R+P Post 31: My Call Sheet

As well as the storyboard, we have created and distributed a call sheet to all of our band members and crew. This call sheet can be seen below:


The call sheet provides a detailed list of every component of our shoot: locations, costume, equipment, call times and contact information are all collected on this document. Therefore it will be an essential item during our shoot to confirm that everything is going smoothly.

R+P Post 30: My Shoot Board

The Shoot-board will probably be the most important document we take to each of our shoots. Not only does it contain a list of every shot we need to get, but it also allows us to see whether we're working at a quick enough pace to finish the shoot in time.

Due to the nature of our shoots, we have made two shootboards: one for the shoot on the rooftop and another for our shoot in the studio. Below are examples of a page from both.

Rooftop Shootboard:

Studio Shootboard:
Key:
Setup No.: The number of our setup; ordered in a way so that we can take each shot quickly and efficiently.

Time: The time at which we plan to take the shot

Location: The location at which the shot will take place

Description/Camera/Dialogue: The detail of the shot itself; what is happening with the actor, camera etc.

Actors/Props: The actors and props that will be needed for this shot

Director/Camera Op./Sound: The crew member who will be performing each of these roles. We have left these blank as we want everyone to take on each role in a flexible manner.

Takes: How many takes of each shot we have taken. This will be filled in during the shoot.

Identify good takes: Whether we have a good take of this shot. This will be filled in during the shoot.


Wednesday, 9 December 2015

R+P Post 29: Rehearsals

As soon as we had finalised our actors we arranged some time for our band to rehearse; we wanted to make sure we could make our performance look as authentic as possible. Therefore we have organised a schedule with the other groups to make sure we have time to use the studio.
It is very useful that we have got the whole of Tuesday to rehearse, as our performance will need to be refined rather than produced. As such it is easier for us to spend an entire day practicing and perfecting this performance rather than having to work on it periodically over a long period of time.

Reflections on our rehearsals:
Having had time to review the footage we gathered from our rehearsals, we have identified the things from our rehearsals which needed to be worked on before our shoot:
  • We needed to give our band members some moves to fall back on - The rehearsals made us realise that there are a lot of times when a band member doesn't really know what to do, so instead they just stand in place. If we were to give them some actions to splice inbetween the performance this would be less frequent
  • We had to learn the timing on group actions - We attempted to time a jump after the bridge, but it was more difficult than we had anticipated to time it correctly. We were able to grasp the timing reasonable well, but we will need to perfect it before our shoot.
  • Facial expressions were key - The facial expressions during our rehearsals needed a lot of work, especially considering the number of beauty shots we will have in our music video.
Below is a clip from our rehearsals:

Thursday, 3 December 2015

R+P Post 28: My Kit List

We plan to use a wide variety of technical equipment during our shoots, and this equipment list differs between the shoots in the studio and on the rooftop:

Studio Kit List:
  • Canon 5D Mk II
  • Libec TH-950 DV Tripod
  • Shotgun microphone
  • Headphones
  • Spare batteries
  • 2x 16 GB Flash Cards
  • 4x 650W floor lights
  • 24mm - 105mm Canon L Series Lens
  • 50mm Canon Lens
  • Cardboard Bokeh Stencils
  • HDMI Cables
We also have a range of equipment within the studio at our disposal. This includes the following:
  • White Cyclorama
  • Studio Lighting Rig
  • Leapfrog Lighting Desk
  • 50 inch Monitor
  • 15 inch Mac Book Pro
  • Studio Sound System

This is the camera bag we took for our
rooftop shoot.
Rooftop Kit List:
  • Canon 550D
  • Tripod
  • Shotgun microphone
  • Headphones
  • Spare batteries and SD cards
  • 3x 650W floor lights
  • Lenses (find mm)
  • Bokeh stencils


Bokeh
One of the more unique techniques we want to experiment with using the equipment above is using bokeh to create pictures or text out of light. We discovered this technique through our visits to different universities and we thought it would be an effective way to convey our themes surrounding technology.

We decided to do a quick test to see if we could replicate this effect and managed to get the following results. Overall we are happy with what we have been able to achieve, so we aim to use this technique in our final production.

R+P Post 27: Casting

Our approach to casting our band members was that reliability and accessibility should be placed above everything else: our intended location for the performance shoot and the execution of our conceptual shoot meant that commitment had to be a priority. Therefore we all agreed that casting members of our own group would be very beneficial, though this had limitations. We would need at least one of us to operate the camera during shots with the whole band in, and even with the three of us we would want another member in our group. Therefore we decided that we would cast Shayam and Amber in the band whereas I would manage the camera.

As we only needed two male band members to finish our line-up, we produced a shortlist of everyone we knew who would be suitable for the role. One of our first ideas for the lead singer was Jacob, a classmate of ours who was involved in the music video project from the previous year. This meant that he was aware of the process and commitment required, and since then he had adopted a look more suitable for our music video. Unfortunately, he could not ensure that he would have enough time to act in our video, so we continued with our shortlist.
We then turned to our other initial candidate for the lead singer: another of our classmates called Luke. Not only did he fit the image we were looking for in our lead, but as he is in a band himself it meant that performance and rehearsal would have been much more straightforward. Luke has also done photography work as part of his band, modelling for the promo shots would come more naturally to him. When we asked him, we were thankful that he had the time to commit to the project, so we have cast Luke as our lead singer.

Finally we needed a drummer. This role had less of a concern over performance than the others, so we decided to ask people who we knew would be enthusiastic for the role. A friend of ours, Seb, was one of our first choices as we know him as someone who's always willing to get involved in interesting projects. Though he has little experience with an instrument, he is an avid music fan and was able to pick up a good drumming technique very quickly. Therefore we decided to cast him as our drummer.

We collaborated the information about our actors on a casting sheet, so that we could find pictures of our actors, their necessary personal information and explanations and references regarding their role in the band at a glance.


R+P Post 26: Set design, locations and props

As our video has both a performance element and a concept element, we used two different sets as we wanted to have a clear difference between the two settings. Therefore we decided to shoot at two different locations:

Performance Shoot Location & Set Design:
We found that urban environments
were very common choices
for music video locations
When considering our options for the performance section, the main issue we came across was permission: we were aiming to shoot in an urban or industrialised setting, as our research into the genre suggested that this was common, but acquiring the necessary permissions was difficult. Thankfully, we have been lucky enough to get permission to use the rooftop of a graphic design company in Soho: Tapestry. We have decided that this will be our shoot location, as the opportunity to shoot on a London rooftop was not something any of us were eager to pass up. Additioanlly, we know that rooftops are quite conventional settings for rock and indie rock music videos such as Rooftops by Lost Prophets
We had seen the setting of a rooftop used
quite often in rock music videos
Our three lights are
marked as 1, 2 and 3.
L is our lead singer, G1
and G2 are our guitarists
and D is our drummer.
The M represents the
camera position for
master shots.
After having visited the rooftop at Tapestry and practiced with our set design, we decided to make a sketch of our final decisions. This meant that we could confirm whether our lighting setup was adequate and refer back to it on subsequent visits.

The main issue we found was with lighting: it was difficult to get enough light on our drummer. Not only did we have to make sure he was receiving a good amount of light, but the position of the source was important as the guitarists often obstructed it during the performance.

Concept Shoot Location & Set Design:
Deciding on the location of the shoot for our conceptual element was much more straight-forward: our school is equipped with a studio which was perfect for our needs. The high level of control the studio offers us made it the best choice for our shoot, as control is something which is absolutely essential for the ideas we have. 


The set design for the shoot in the studio was a little bit easier than the performance set: most of our lighting was provided by the built-in studio lighting, though we used some floor lights to fully cover our backdrop as well. As we were able to use a white cyclorama in the studio, this meant that we had a lot of room to move the camera in without losing too much quality. The crosses on our set design map indicate the piles of paper we will be using for one of our concepts. (needs studio pic and set design pic)

Props:
In order to organise exactly what we would need for each shoot, we divided our prop list into two: one for our performance shoot on the rooftop of Tapestry and another for our concept shoot in our school's studio. 

Performance Shoot Props:
  • Two guitars
  • Drum-kit + drumsticks
  • Microphone + microphone stand
  • Fairy Lights
  • Sheets of paper
Concept Shoot Props:
  • Desk and chair
  • Laptop
  • Several tall piles of paper
  • Fairy Lights

R+P Post 25: Costume, props and makeup

Make-up:
We spent a long time considering how each of our band member's should have their make-up, since it plays a large part grounding their image and character. We are currently quite confident that the actors we were intending to cast will be able to commit to the project, therefore we have made a table with pictures of our band members and examples of real artists who we wish to style them after.
We will refer back to this when we need to put make-up on for our future shoots.

Costume:
Similarly, our costume was an important thing to consider when constructing our band's characters. Again, we have made a table so that we have a clear visual reference of what we want our costumes to be.
All of this information for our costumes and make-up will be on our call sheet.


R+P Post 24: Planning my digipak panels

Our research into our band's genre has influenced a number of different plans for our digipak panels:

Design 1:

This was one of our earliest ideas for the front panel on the digipak. The style is reminiscent of a 60s pop-art style, and we found many bands similar to our own which had incorporated a design like this in their own albums. The main concern we had with this idea was that it would be difficult to convey each band member's character effectively with this cover. Furthermore, we didn't have many ideas on what we could use for the inner panels as there isn't a lot in this cover that we can use to connect the inner and out panels.


Design 2:

The Ramones were one of our
more influential references for
this album plan
This idea originated from the proposal of the album name: The Honeymoon is Over, an idiom which suggests that a previously great situation is no longer how it initially seemed. We thought this was fitting for our band, as this sort of connotation is common in the indie genre. Additionally, our band name Come What May is also an idiom, so this album cover would establish a stronger, synergistic band image. However, we weren't convinced by the background in this album cover as we thought it was a little bit too generic.

Design 3:
This was our final plan: a group shot of our band split in-between several monitors. Our reason against using this design was that our models would have been obstructed by all of the monitors.


Wednesday, 2 December 2015

R+P Post 23: Planning my web pages

We are intending that our website for Come What May be recognisable, yet engaging for our target audience. In order to ensure this, we created a flat plan for each of our planned website pages.
The Arctic Monkeys' website has
heavily influenced the design
and colour scheme of our own site

Theme and Style:
We decided that a clear black and white colour scheme would be the best for our website, as not only would it appeal to our target audience, but it is also a clear signifier of our band's image and genre. The websites for Nothing But Thieves and The Arctic Monkeys were some examples of references which influenced these thematic choices.

Home Page:
George Ezra's website promotes
his identity as a star and his debut 

album on the frontpage
All of us agreed that the homepage should be appealing and quick to grab attention, so we designed our homepage with the intention of everything being recent and up to date. Our music video will be the band's most recent work, and therefore taking up most of the front page. On the side will be a textbox with an announcement about the band's new album. Some of the influences for these design choices came from the websites for George Ezra and The Killers.
The Killers' website immediately
presents a video to the audience.

This is something we plan to do
with our own homepage


Videos:
We decided that we should include a page for videos on our website, as they provide a free and easy way for the audience to interact with the website. Our initial idea was to open up the page with multiple videos rather than fill it up with a single video like our homepage. An adaptation of this however, would be to have a small description of each video to the side.

Gallery:
This page will have multiple collages of different pictures, grouped up by event or contents. For example, we will have a collection of pictures taken during our music video shoots, as well as galleries for each of our individual band members. This allows members of our audience to take their own approach to the band: they can consume the website's material in great depth by browsing the more detailed galleries, or they can simply look up a gallery for their favourite member of the band or music video.

Tour & Merch
These pages provide the most committed type of audience interaction, as they provide opportunities for fans to spend their money. Therefore we decided to offer a variety of different options: multiple dates for tours at various venues as well as a wide range of objects in the store. In regards to the store, we chose to be more selective about the products available as there are many objects which are common on mainstream artist websites, but our intended audience would not be interested in.


R+P Post 22: Planning my promo shots

In order to assist the development of our digipak flat plans and for future use on our website and social media pages, we decided to plan some promotional shots. These shots would vary between individual shots of each band member to shots with the entire band, so we decided to sketch out a number of different ideas for how these promotional shots should look. Below are some examples of these ideas.
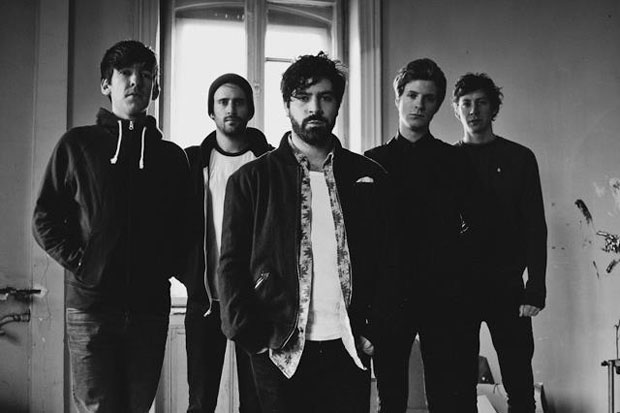
Foals are an example of an indie rock band who have
promotional pictures similar to this
This plan is for a standard shot of the band, lined up in costumes that connote the qualities of their character. The style of shot is quite typical for indie rock bands, so we believe this shot will be important for our social media pages as it is a clear signifier of our band's genre. Furthermore, this shot is extremely useful simply because it portrays every member of the band at once. This means that shots of this style will be the most common on our online galleries on the band's website and other pages.
This promo shot is very similar to the one above, but instead the band is sitting down rather than standing up. Whilst this may seem a minor change, it is an easy way to signify the more sullen nature of the band members and the band's image as a whole, as this connotation is quite common within our genre. We found many existing indie rock bands who utilise this positioning in their own promotional shots such as Nothing But Thieves.

Then we decided to have basic close-ups of each of our band member's as well as a shot of their head from the side. We plan to use these shots primarily for our website, as the side-on shots will give us a more way to display each member of our band more creatively and in-line with our genre's conventions. The close-up shots are useful in several different scenarios, including website galleries, social media promotion and more. As well as these solo shots, we are considering pairing members of our band up for some shots, though we want to avoid pairing members of our band up too much as we would rather use pictures with our whole band in.


R+P Post 21: My key shots storyboard

Using our timeline as a rough guideline, we will proceed to identify the specific shots we wanted in each of our defined sections. This allows us to clearly pinpoint particular elements of our shots, such as actions, movement and framing. We will make this using an A3 piece of paper and a variety of sticky notes.


The colours of each sticky note will denote the framing of each shot. This means that we can look at the shot at a glance and understand how the shot should look, as the drawings themselves will be quite crude.

Many of our key shots were inspired from real videos; for example the shots of the guitar face are present in many different music videos, but we found them used well in the music video for Itch by Nothing But Thieves.
This close-up on the guitar would likely be taken handheld or at a low angle, though we will utilise camera movement to keep up the pace of the shot.

Similarly, the music video for If You Can't Hang by Sleeping with Sirens was one of many music videos which inspired both our master shot composition and the attitude of our lead singer.


Though we have a different number of band members than Sleeping with Sirens, the composition is largely the same: lead singer in front, two guitarists on either side and the drummer at the back. This is a relatively typical composition for a band with four members, so we would try and make the shots more exciting by introducing camera movement and changing the angle to a shot from the side.